
Unlock the wonders of the universe from the comfort of your home by tapping into the power of remote astrophotography. This comprehensive guide will walk you through everything you need to know to start accessing, downloading, and processing astronomical data from our remote observatory.
remote Astrophotography
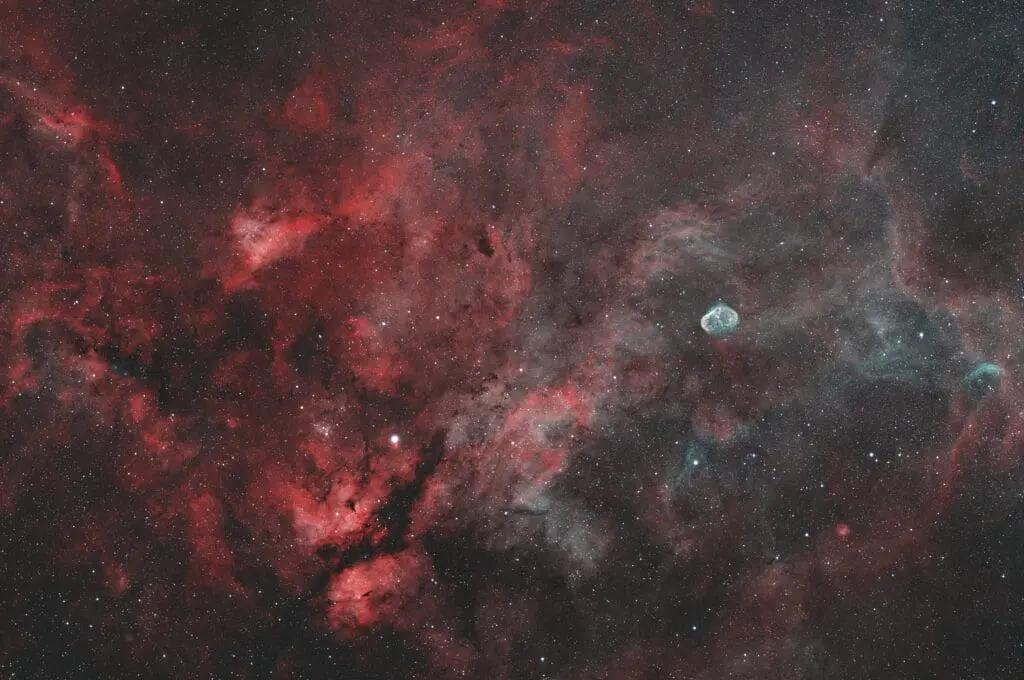
Astrophotography is a captivating hobby that combines the beauty of the cosmos with the art of photography. However, not everyone has access to dark skies or the necessary equipment to capture stunning celestial images. That’s where remote astrophotography comes in.
Our remote observatory offers you the chance to harness professional-grade telescopes and cameras located under pristine dark skies. All the data—including flats, bias, darks, and subs—is readily available through our Nextcloud instance, allowing you to download and process images from anywhere in the world.
In this guide, we’ll cover the top 10 things beginners should know about downloading, using, editing, and working with remote observatory data.
1. Understanding Remote Astrophotography Data
What Is Remote Observatory Data?
Remote observatory data consists of raw images and calibration files captured by our telescopes and cameras. These files include:
- Light Frames (Subs): The primary images of celestial objects.
- Dark Frames: Images taken with the camera sensor covered to capture sensor noise.
- Bias Frames: Shortest possible exposures to record readout noise.
- Flat Frames: Images of a uniformly illuminated field to correct for optical imperfections.
Why Use Calibration Files?
Calibration files are essential for removing imperfections and noise from your light frames, resulting in cleaner and more accurate images. When you calibrate your light frames, you’re optimizing the data to really surface those faint details that may otherwise be lost to dust and sensor noise.
2. Accessing Our Data via Nextcloud
What Is Nextcloud?
Nextcloud is a secure, open-source file hosting platform that allows you to access and sync files across devices. All members get access to our nextcloud instance for the duration of their subscription and there are no artificial limits imposed on access to our data. We’re not like other imaging groups where you pay $1,500 a year to get access to data only for that year. We keep it simple, and we have no “Fear of missing out” and more importantly, we save you hundreds if not thousands of dollars a year.
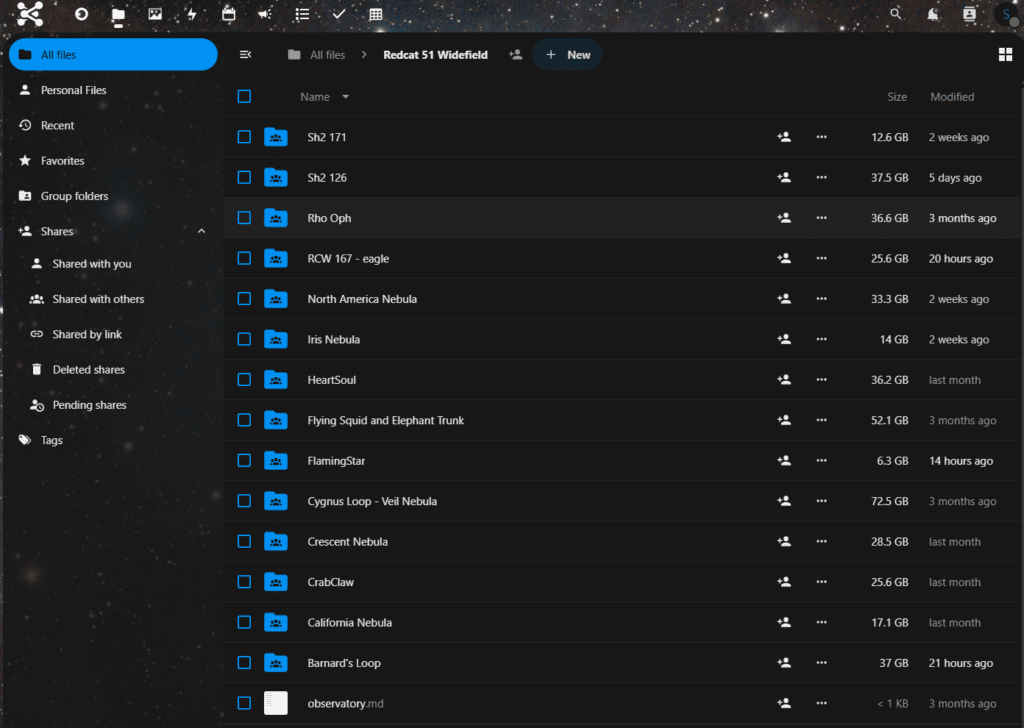
How to Access Data
- Web Access: Visit our Nextcloud web interface, log in with your credentials, and navigate to the desired folders to download files directly.
- Desktop Sync: Install the Nextcloud desktop client to sync files automatically to your PC.
For detailed instructions, check out our Nextcloud Access Guide.
3. Downloading Data Efficiently
Selecting the Right Files
- Target Selection: Choose the celestial object you’re interested in from the available data. We recommend that you download each day invidiously or that you sync by target through the nextcloud sync too. If you attempt to sync the entire system, be ready for 100s of gigabytes of data as well as nightly updates of 10-30gb!
- Necessary Files: Ensure you download the corresponding light frames and all relevant calibration files (darks, flats, bias). You can always keep local copies of darks, bias and flats since they are used for long periods. In fact, if you process your images with PixInsight or Siril, you can save your integrated calibration files and re-use them to reduce integration time.
Using Nextcloud Sync
- Installation: Download and install the Nextcloud desktop client for your operating system.
- Configuration: Connect the client to our server using your login details.
- Selective Sync: Choose specific folders to sync to save storage space.
4. Organizing Your Data
Folder Structure
Maintain a clear folder structure on your PC:
Astrophotography Projects│
└───Target Name
    │
    ├───Lights
    ├───Darks
    ├───Flats
    └───Bias
File Naming Conventions
- Consistency: Keep file names consistent to avoid confusion during processing.
- Metadata: Ensure each file retains its metadata for accurate calibration. We also save imaging csv files for each night observing with some of the observation details so you can use this information to see if you want to cut/cull/remove any files from your integration.
5. Essential Software for Processing
Image Processing Tools
- DeepSkyStacker (Free): Ideal for stacking and calibrating images.
- Siril (Free): Stack, Calibrate and Process images. Open Source.
- PixInsight (Paid): Advanced processing with extensive features.
- Photoshop/GIMP: For post-processing and touch-ups.
Choosing the Right Software
As a beginner, start with user-friendly software like DeepSkyStacker before moving on to more complex programs or start with a tool/program that you are somewhat familiar with to reduce the learning curve.
6. Calibrating Your Images
Why Calibration Is Crucial
Calibration removes systematic noise and optical imperfections, enhancing the quality of your final image. When imaging objects in dark skies, we have to pull out all the tricks of the trade to optimize the entire process to surface those very faint structures and details. Calibration of our light frames to remove sensor noise and optical artifacts is crucial to getting the best image with the best data possible.
Calibration Steps
- Load Light Frames: Import your subs into your processing software.
- Add Calibration Files: Include darks, flats, and bias frames.
- Align and Stack: Let the software align stars and combine frames to improve signal-to-noise ratio.
Our calibration guide will be online shortly – check back for updates.
7. Processing Your Stacked Image
Basic Processing Steps
- Stretching the Histogram: Adjust brightness and contrast to reveal hidden details.
- Color Balancing: Correct color casts for a natural appearance.
- Noise Reduction: Apply filters to minimize residual noise.
- Sharpening and Detail Enhancement: Bring out fine structures in nebulae or galaxies.
Tips for Beginners
- Non-Destructive Editing: Work with layers or copies to preserve original data.
- Incremental Adjustments: Make small changes and assess the impact. It’s better to under stretch and stretch some more than to over stretch and lose details.
8. Understanding Image Formats
Common File Types
- FITS Files: Standard in astronomy, containing metadata and high bit-depth data.
- TIFF Files: High-quality format suitable for further editing.
- JPEG/PNG: Compressed formats for sharing but not ideal for processing.
Working with FITS Files
Ensure your software supports FITS files to fully utilize the data’s dynamic range. FITS file formats preserve observational meta data to help processing tools from color calibration to plate solving. It’s important to keep the data in FITS (or XISF if pix insight) through the duration of processing and using TIFF or JPG/PNG for final image sharing.
9. Troubleshooting Common Issues
Artifacts and Imperfections
- Dust Shadows: Use flat frames to correct.
- Hot Pixels: Darks and bias frames help remove these. We frequently “dither” so these should be removed through large integrations of many subs.
Alignment Problems
- Star Trails: Ensure clean subs during stacking. “Blink” your data to preview them to make sure we didn’t have any subs with star trails. This is usually a symptom of imaging through clouds or something where tracking/guiding may have failed. We have automations that will try and stop the current image run, re-calibrate, re-center and re-focus but some bad frames may make it through until we manually review.
- Double Stars: This may suggest a misalignment; please re-examine the calibration files and ensure that your subframes are correctly aligned. For instance, when processing LRGB, you should process each of L, R, G, and B separately and then perform a star alignment on the images again before combining them into a full-color LRGB image.
Software Errors
- Updates: Keep your software up-to-date.
- Support Forums: Utilize online communities for assistance.
10. Sharing and Learning
Join the Community
- Share on Discord: Join our discord server and share on our imaging forum. Every member should receive an invite link upon registration.
- Share on Astrobin: Upload to astrobin and select the “RockchuckSummit Observatory” as the observatory images were acquired from and they will show up on our observatory gallery!
- Online Forums: Participate in astrophotography groups to share your work and get feedback.
- Social Media: Share images on platforms like Instagram or Reddit.
You have 100gb of storage on our systems so you can share & link your final images right from our cloud!
Continuous Learning
- Tutorials and Workshops: Attend webinars or read advanced guides.
- Experimentation: Try different processing techniques to develop your style.
Remote observatory
Embarking on your remote astrophotography journey is an exciting adventure that bridges technology and the cosmos. By accessing our remote observatory’s data, you have the opportunity to capture and create stunning images of the night sky without the need for personal equipment or dark skies.
Remember, patience and practice are key. Start with the basics outlined in this guide, and don’t hesitate to explore deeper into each topic as you become more comfortable.